


Things To Avoid For Perfect Dental Impression At Home
Excitement is in the air when you order your UpSmile’s no-risk impression kit. Purchasing the kit means you’ve decided to take that next step to realign your teeth with our invisible aligners. However, once you receive the kit in the mail, next will come the tricky part of getting a perfect dental impression of your teeth. An excellent dental impression will ensure accurate, clear aligners, and perfectly fitted ones at that. Below are a few of the common mistakes people tend to make while taking their impressions with UpSmile’s no-risk impression kit and how to avoid them.
Dental Impressions At Home

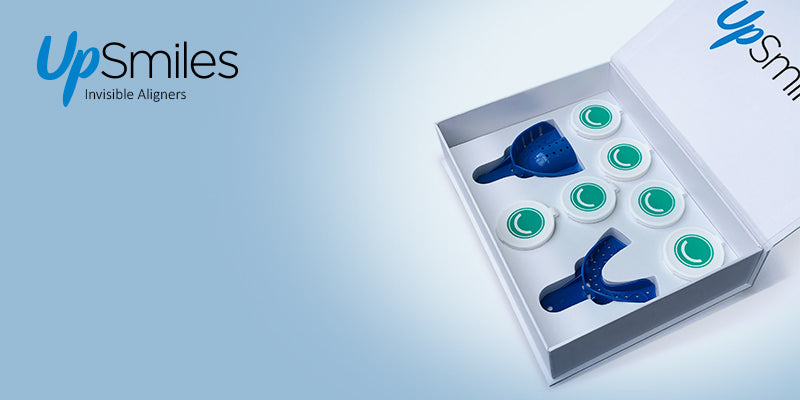
Making a dental impression in the comfort of your home is very easy because we’ll include all the tools to help you. In your no-risk impression kit, you will receive:
- Impression Trays
- Molding Putty
- Lip Stretcher
- Plastic Gloves
To ensure your dental impression is made correctly, your no-risk kit includes a tele-visit with our staff to help you achieve great dental impressions at home. When making your dental impressions, make sure to have at least 30 minutes available to create perfect impressions. We would also advise making them in your bathroom; that way, you are close to a sink and have a mirror to see what you’re doing.
What Are Dental Impressions?
Dental impressions are imprints of your upper and lower teeth and gums, which your dentist/orthodontist uses to review and determine if you will be a Mild, Moderate, or Moderate+ UpSmile’s aligner case. Then the lab uses the impressions to create your custom invisible aligners.
Things to Avoid While Making an Impression

Improper Putty Mixture
You will receive two different putty colors, green and white. One is a catalyst putty, and the other one is a base putty. These two putties need to be mixed together until they are a solid color. If you see streaks are a marbled like look of the green or white colors, it means the impression putty isn’t mixed properly. When the two putties are not combined well, the impression will not set up correctly. To avoid this dental impression error, make sure to follow the directions and mix the two colors really well for the specified amount of time.
Taking a Double Impression
Another mistake to avoid with your home teeth impression kit is taking a double impression.
Once the putty is mixed well and placed in the impression tray, you will need to place the tray in your mouth evenly over your teeth and apply light pressure to both sides of the tray with your thumbs. Not holding the tray in place can cause it to shift and make a double impression. To avoid this dental impression error, gently hold the tray in place to ensure that it doesn’t move while making your dental impression until the putty material sets.
Uneven Shape

To avoid an uneven shape, make sure to center the U-shaped tray over your teeth when taking your dental impressions at home. Once the tray is centered over your teeth, slowly press the tray onto the surfaces of your teeth with even pressure. If the tray isn’t centered or pressed down properly, the shape of your dental arch will be uneven, and your teeth will appear shallow on one side. To avoid this dental impression error, make sure to maintain gentle pressure with your thumbs on both sides of the tray so that the impression of your teeth is even. Also, line up the U-shaped tray to match the U-shape of your teeth.
Make a Good Impression

A good impression will be even on both sides and show the correct shape of your teeth past the gum line. Here are a few dental impressions tips to help you make a good impression.
- Try the tray in before putting in any putty to see how it fits and feels. This will be a good practice run before it has impression material in it and it’s showtime.
- Use the tray’s handle as a guide to line up evenly to your nose when placing the tray in your mouth; this will ensure the tray is even on both sides.
- Fully insert the tray into your mouth past the gum line to get a perfect imprint of your teeth.
- Roll your lips off the tray, or use the lip stretcher provided to keep your lips away and out of the impression putty. We don’t need impressions of your lips, just your teeth.
- Don’t push too hard; the tray should not touch your teeth, just the putty inside the tray.
- Don’t bite down while taking your at-home impressions; keep your mouth and teeth open. Instead, use your fingers to apply pressure.
- Hold the impression tray completely stable until the material sets in your mouth; otherwise, you will create a double impression.
- Don’t move the tray while the material is setting up in your mouth. If the material isn’t set, it can smear or have bubbles if removed too early.
- To remove the trays, simply pull straight down on the upper and pull straight up on the lower.
- If the impression tray seems stuck, gently rock the tray from side to side to loosen its grip on your teeth.
- Don’t be surprised while taking the impression if you seem to have a lot of saliva, this is quite common and is why we recommend doing this close to a sink if you need to spit or drool.
Don’t worry about making your dental impressions at home; we’ll guide you through the process and give you dental impression tips to assist you in making a great set of dental impressions. Just make sure to follow the directions and the specific time limits provided.
Also Read: Teeth Whitening Tips To Make Your Smile Brighter
What if I Have a Gag Issue?

No problem, we have some dental impression tips for you! A few ways you can suppress your gagging while taking your dental impressions at home would include:
- Placing a pinch of table salt under your tongue.
- Titling your head forward while taking the impression over the sink.
- Breathing through your nose.
These are just a few common ways to help relax your gag reflex while taking a dental impression at home.
Conclusion:
Have no fear; with all these helpful tips and guided tele-visit with one of our UpSmile’s staff, you will have all the tools to make great dental impressions at home.
After that, the next step will be to send them in for review to determine your treatment plan. Then we will guide you through your customized plan and provide a preview of how your teeth will realign. Within a few short weeks, your custom aligners and treatment plan are delivered to your door. It’s that easy!
But it all starts with a great dental impression at home, which we know you can achieve!